




Shower Door Bottom Sealing Strip Leaks: Gap, Fit, and Installation Fixes
Water pooling outside your shower does not always mean the entire door needs replacing. A leaking shower door bottom sealing strip may be worn, incorrectly sized, or installed with its drip fin facing the wrong direction. Even a small mismatch between the seal profile, glass thickness, and floor clearance can let water escape. The useful starting point is not a thicker strip: it is finding where the water crosses the enclosure.
Check the leak before ordering a replacement
Dry the door, threshold, and surrounding floor. With the door closed, run water gently against the inside of the glass, keeping the showerhead away from joints at first. Watch where moisture appears outside. Then test the lower corners and side joints separately. Avoid directing a strong jet at the seal; this can overwhelm a splash-control profile without revealing the everyday leak path.
Water appearing beneath the middle of the door points toward insufficient sweep contact, a damaged fin, or poor drainage direction. A wet corner may instead involve the junction between the bottom strip and vertical seal. Water emerging beneath a fixed frame can indicate failed perimeter sealant or a drainage problem. Replacing the door sweep will not correct those faults.
Also check whether the door has dropped or shifted. Uneven clearances, rubbing at one corner, or a latch that no longer aligns can indicate a hardware issue. Do not loosen hinges supporting heavy glass without appropriate support and the manufacturer’s procedure; that is a job for an experienced installer.
Measure the gap and identify the profile
A replacement must match both the door and the space beneath it. Overall strip height alone tells you very little because part of that height may be the channel gripping the glass rather than the flexible section bridging the gap.
- Glass thickness: Measure the glass itself, not the old channel’s outside width. Check any permanent markings or original door documentation.
- Bottom clearance: Measure from the glass edge to the threshold at both ends and the middle with the door closed.
- Swing clearance: Check the gap throughout the opening arc. A raised tile edge can catch a fin that fits correctly when closed.
- Profile and length: Record the channel shape, fin arrangement, drip ledge direction, and required cut length.
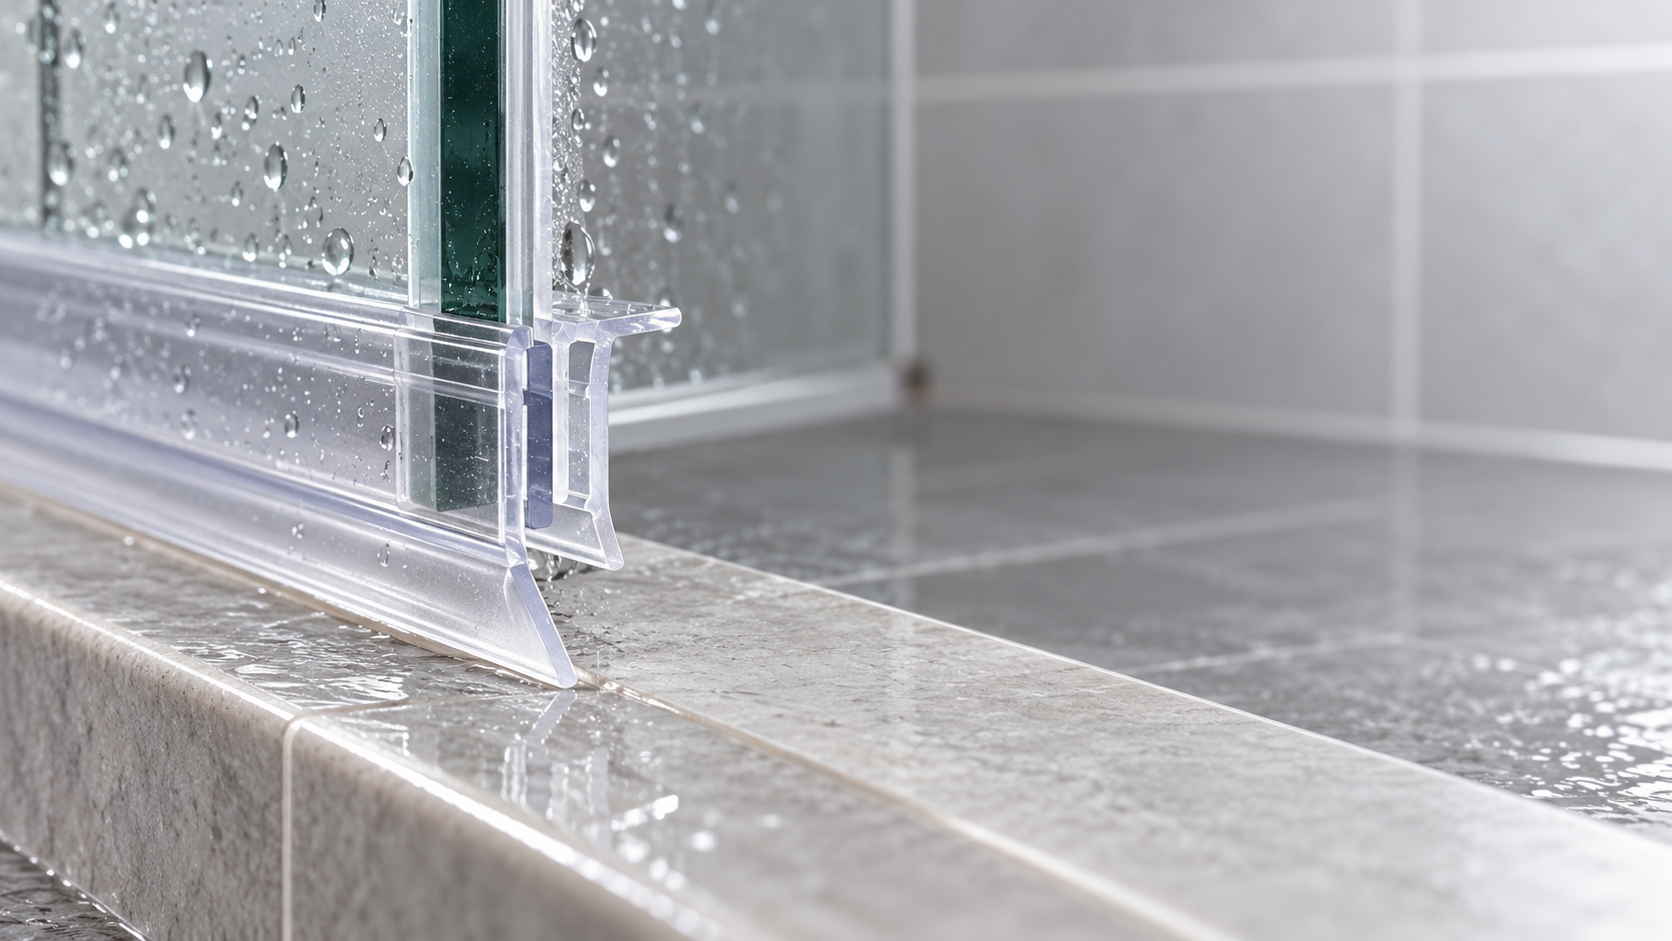
Use the replacement supplier’s dimensional drawing to distinguish channel depth from fin projection. A photograph of the old strip’s end profile is particularly helpful. For framed doors, the seal may slide into a metal retainer rather than clip over glass, so a frameless-door replacement may be entirely unsuitable.
There is no universal correct amount of compression. Where contact is intended, the flexible fin should meet the threshold without folding heavily or resisting door movement. Some profiles mainly redirect water rather than form a continuous contact barrier; follow the door system’s intended design.
Choose for fit, not simply softness
Many clear clip-on seals combine a relatively firm gripping channel with flexible wiping fins. Depending on the product, these may use PVC or other thermoplastic materials. Silicone and EPDM also appear in sealing applications, but material names alone do not establish compatibility. Channel retention, flexibility, tear resistance, cleaner exposure, and the finished profile all matter.
A softer fin may move easily but buckle if it projects too far. A stiffer one may hold its shape yet create excessive drag. Yellowing alone does not prove a seal has failed; cracking, permanent distortion, loose grip, and missing sections are more useful replacement signals.
Application boundaries matter, too. Garage Door Top and Side Sealing Strips serve a different opening geometry and exposure pattern. They should not be treated as shower-door substitutes simply because both products control water and air movement.
At the material-supply level, Hebei Weizhong Rubber Technology, based in Xingtai, has specialized in EPDM reclaimed rubber research, production, and sales since 1986. For manufacturers considering custom reclaimed-rubber formulations, the relevant discussion is compound performance and processing requirements. That material capability does not, by itself, confirm suitability for a transparent shower seal or a particular finished door assembly.
Install without creating a new problem
Remove the old strip using the method specified for its attachment. A clip-on channel, sliding insert, and bonded strip need different handling. Do not pry against the glass edge with a metal tool. If you discover chipped glass, stop rather than covering the damage with a new seal.
Clean away soap residue and mineral deposits with a product suitable for the glass, hardware finish, and replacement material. Rinse and dry thoroughly. Residue can prevent a channel from seating evenly, while aggressive solvents can damage plastics or finishes.
Before cutting, confirm orientation. A projecting drip ledge generally returns runoff toward the shower interior, but profile designs vary. Compare the supplier’s drawing with the actual door rather than assuming the old strip was installed correctly.
Mark the required length and cut with the tool recommended for that profile. Leave clearance for adjacent seals and hardware without creating an unnecessary open corner. Seat a clip-on strip evenly along the glass; do not stretch the flexible section to make it reach.
Do not automatically add silicone inside a friction-fit channel. It can complicate removal, interfere with seating, or obstruct intended drainage. Use adhesive only where the assembly instructions require it, and observe the stated curing time before testing.
Test the repair—and know when to stop adjusting the seal
Open and close the door slowly before running water. If the fin rolls under, squeaks heavily, or prevents closure, revisit the profile and clearance. Trimming the fin at random may remove the water-control feature you needed.
Repeat the controlled water test, then check under normal shower use. If leakage remains at one corner, inspect the meeting point between seals. If water collects on the threshold and runs outward despite correct installation, threshold slope or enclosure geometry may need professional assessment. Do not plug drainage openings to hide the symptom.
A successful repair lets the door move freely while directing ordinary runoff back inside. Keep the replacement’s profile drawing and measurements: next time, those details will be more useful than a listing described only as “universal.”
Leave A Message
If you are interested in our products and want to know more details, please leave a message here, we will reply you as soon as we can.